Back up – Software
Back ups are essential. Professionals need to ensure their digital assets are protected. Everyone wants to know their personal images, videos and documents are safe. Backing up involves a set of protocols; the what, when, where, how (the who and why are obvious), the media, hardware, and software. Today I want to look at software.
SuperDuper! back up for Mac (image courtesy of ShirtPocket)

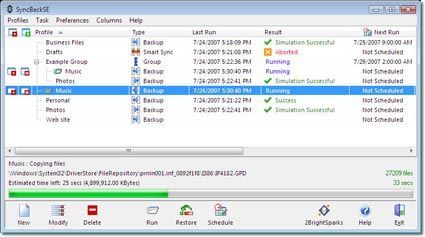
There are many software companies offering back up solutions; most of whom are happy to take your money. I have tried and recommend (caveat emptor) are SyncBack for Windows and SuperDuper! for Mac. While it is silly to skimp on anything to do with back ups I realize many creatives are scrooges. SyncBack offers a free version and Carbon Copy Cloner for Mac is a low cost donationware app.
SyncBackSE back up for Windows (image courtesy of 2BrightSparks)
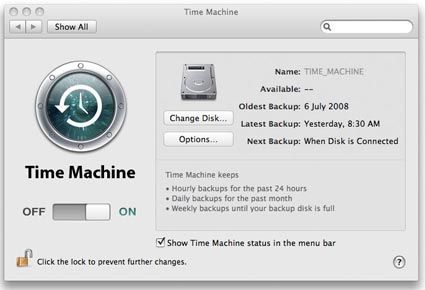
In a previous newsletter I mentioned Apple’s Time Machine which is included in Leopard. It’s pretty good and certainly better than not doing back ups at all. However Time Machine can complicate things if you mix it with other back up software. SuperDuper! offers intelligent handling of Time Machine data but it isn’t for the faint hearted.
Time Machine back up for Mac (image courtesy of Apple)
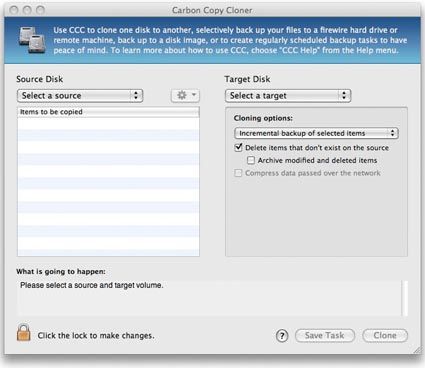
Cloning your hard rive ensures you can continue working when it fails. Not if, when. Cloning Mac drives including boot drives is simple using tools like SuperDuper! and Carbon Copy Cloner. That means even if the your operating system drive fails you only need to plug in your cloned drive, boot up and continue working.
Carbon Copy Cloner back up for Mac (image courtesy of Bombich Software)
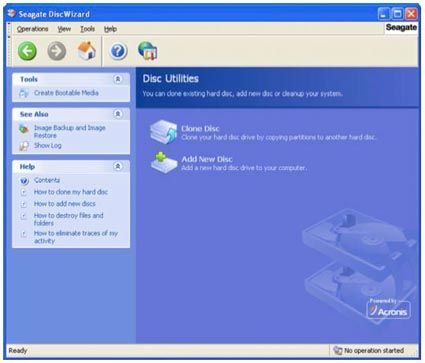
Windows is almost as easy to make a boot drive clone with Acronis True Image. If you have Seagate or Maxtor hard drives check their DiscWizard utility which is based on True Image.
DiscWizard back up and disc clone for Windows (image courtesy of Seagate)
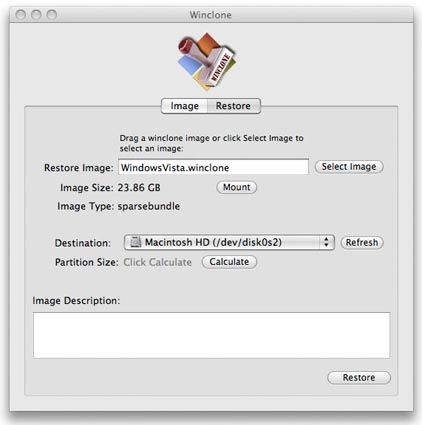
Back ups should be automated and all these solutions offer this via scheduling. One final piece of software for Mac I like to use is the donation-ware Winclone. Those using Bootcamp need to clone the Windows partition and Winclone makes it a cinch to back up and restore Windows XP and Vista from within OS X.
Winclone backs up Boot Camp on Mac
SyncBack: https://www.2brightsparks.com/
SuperDuper!: https://www.shirt-pocket.com/
Carbon Copy Cloner: https://www.bombich.com/
True Image: http://www.acronis.com/
DiscWizard: www.seagate.com/
Winclone: https://twocanoes.com/
File Systems – Mac and Windows
Personally, I like to use Windows desktops and Mac laptops. With the occasional MacPro and Windows laptop thrown in for good measure. Windows and Mac can be considered pretty much mutually exclusive. Moving files between systems can be a pain. In reality many studios and offices have mixed operating systems. Sharing files can cause headaches. For the file system Windows uses NTFS and Mac uses HFS+. What do these acronyms mean?
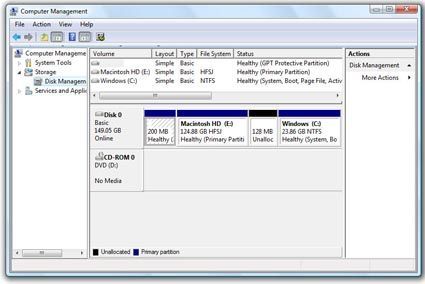
Windows NTFS (New Technology File System) was created to offer more security and reliability over earlier DOS file systems. NTFS allows longer filenames, up to 255 characters. As we move to database driven applications we need to look at how big they can grow. Microsoft suggest the maximum file size on NTFS is 16Tb. Theoretically the limit is enormous, about 18 exbibytes. For just how large that is, here’s the math: 1000 x Gb = 1 Terabyte, 1000 x Tb = 1 Petabyte, 1000 x Pb = 1 Exbibyte.
Windows Disk Manager lets you format drives
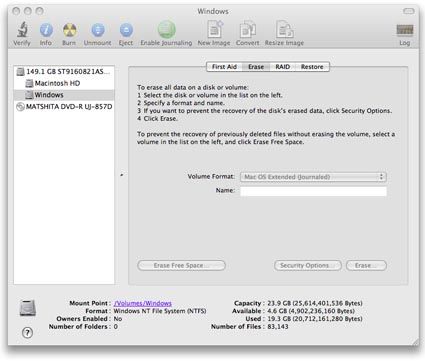
Mac HFS+ (Hierarchical File System Plus) used in OS X is based on Unix. Apple added Journaled which helps avoids corruption. Like NTFS HFS+ allows filenames up to 255 characters, but (only!) supports file sizes up to 8 exbibytes.
Mac Disc Utility formats drives
FAT32 (File Allocation Table 32 bit) harks back to before Windows 95, and is the file system most digital cameras use for memory cards. Mac and Windows can both read/write to FAT32 so it works well for small, portable hard drives in a mixed operating system environment. Once again filenames can be up to 255 characters. File sizes up to 4GB are supported which now precludes some databases. Windows imposes a 32 Gb limit for FAT32. Third party applications and Mac can format much larger volumes, up to 8TB. However large FAT32 volumes are more susceptible to corruption.
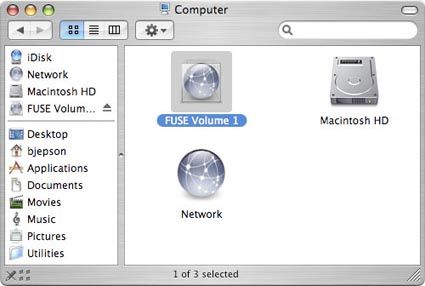
NTFS-3G with the Mac-Fuse driver allows Mac and Linux to read/write NTFS volumes. On Windows a commercial app called MacDrive lets Windows read/write HFS+. While these are reliable I have seen data corruption. And Winclone doesn’t work with Bootcamp drives using NTFS-3G. There must be a better way.
Mac Fuse reads and writes to Windows volumes
Networks and NAS (Network Attached Storage) offer practical solutions to working in multiple format/operating system environments. Today networks are relatively simple to set up and administer. High speed networking is cost effective with most new computers shipping with Gigabyte network cards.
MacDrive allows Windows to read and write Mac volumes (image courtesy of Mediafour)
You don’t need to go the whole hog with a dedicated server. External hard drives offer Firewire, USB2, eSATA, and NAS interfaces. Spend a little more time and money when comparing NAS drive enclosures to avoid being locked into proprietary drivers.
Blu-ray – Here now
It looks like Blu-ray discs have won over HD-DVD as the dominant, next generation media. The battle of Blu-ray versus HD-DVD is similar to DVD- and DVD+, and even more like VHS versus BETA. The manufacturers and Hollywood moguls determine the winner, and this round goes to Blu-ray.
Blu-ray disc (image courtesy of Imation)
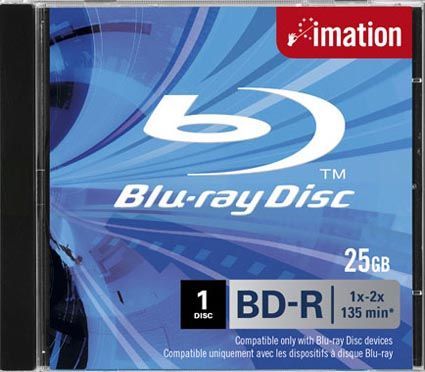
Just as DVD superseded CD for high capacity storage, Blu-ray will become the norm. With storage capacities of 25GB for single layer and an amazing 50GB for dual layer discs Blu-ray makes read only back ups more manageable with ever increasing file sizes. New computers are now being released with Blu-ray burners and the cost of hardware for DIY has dropped to under $200.
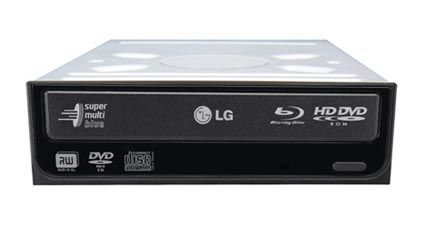
Blu-ray drive (image courtesy of LG Electronics)
Is Blu-ray worth it? If you have a new computer with Blu-ray burner the short answer is yes. It will save you time; feeding DVDs into your computer, splitting folders to fit, and delivering files. Just like buying CF cards calculate the cost per Gigabyte:
Verbatim DVD $0.34 disc = $0.14 GB
Verbatim Blu-ray $11.65 disc = $0.47 GB
At first that it like Blu-ray is more expensive. The real saving is in the manual labour and that cost is harder to calculate. What’s your time worth?
Cloud Storage – as file delivery
Another much promised storage solution for all our digital media is Cloud Storage. An oft cited example is Jungle Disk who use the Amazon S3 service. Jungle Disk mounts on your computer just like another drive. Using fiber optic broadband you upload your data to servers that could be anywhere in the world. The advantages are numerous; redundancy, unlimited storage, access anywhere and no need to maintain servers.
Look, up in the sky, it’s a bird, it’s a plane, no it’s Cloud Storage

The major hurdles to overcome are security and setup. Migrating your current system by uploading terabytes of initial data will be costly and time consuming. It would be better to send hard drives with the data. Which again brings up security. Security is a grey area unless your data has commercial value.
Jungle Disk has a familiar interface (image courtesy of Jungle Disk)
You can and probably already do your own version of Cloud Storage. Gone are the days of delivering images via mail or courier. Clients expect results immediately and for several years many creatives have delivered work via the internet. Using their own web space used to host their website designers and photographers upload a job and then point their client to its location. This can be as simple as a blind link (i.e. no link from your website) or password access to a folder. Let’s look at an example.
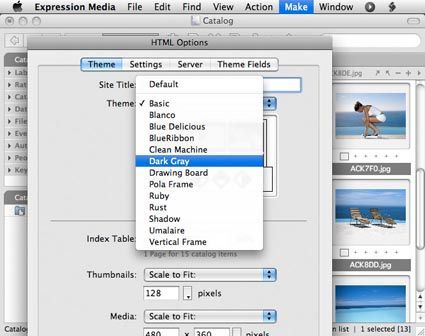
Custom Flash web gallery from Microsoft Expression Media 2

Once I’ve completed a photography assignment I make a low res web gallery and upload it to my www.photographer.com.au domain that matches my website style, all within in Expression Media. My client receives an email with the link. The client can share the mini-website with colleagues and they send me a request for their preferred images. I then upload those images and send the direct links in an email. If the job is urgent I upload the high res files that link from the web gallery. In Expression Media this is as simple as selecting a web template.
Custom HTML templates. Make web galleries in just one click
The advantages to my client are faster turnaround especially for overseas clients. The advantage to me is less work burning DVDs and printing proofs while still billing for the delivery service. Plus we are reducing carbon emissions.
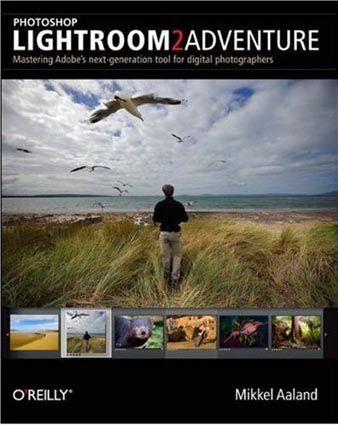
Lightroom Adventure 2 – The Book!
Mikkel Aaland has finished his latest book on Adobe Photoshop Lightroom 2. His previous Lightroom Adventure book was a huge success. It proved to be one of the best ways to learn Lightroom; through the eyes and words of pros in the field. With Lightroom Adventure 2 Mikkel increased the talent pool with some 18 photographers and engineers who lead you through a creative RAW workflow. Mikkel has let us have a sneak peak at some of the opening content for a few chapters below.
The Lightroom Workspace Revealed
Lightroom is designed to streamline the process of importing, processing, and sharing your digital images. Many photographers will find the controls and menus extremely intuitive and will quickly grasp the underlying logic behind the modular design. Although much can be discovered by simply experimenting on your own, there is a lot to the application that doesn’t immediately meet the eye. In this chapter, I’ll take you on a short Lightroom test drive, point out what is new to version 2 and give you a general overview of this groundbreaking application.
Adobe Photoshop Lightroom 2 Adventure book – sneak preview
(image courtesy of Mikkel Aaland)
Importing Images into Lightroom
You don’t “open” image files in Lightroom like you do in Photoshop, or “browse” to image files as you do with Adobe Bridge. You must first “import” images into Lightroom, either directly from your digital camera, or from your hard drive or other storage device. On import, Lightroom creates an image preview and a link between the preview and the original image file. When you work on your image in Lightroom, the program keeps a record of any changes in a database catalog and never touches a pixel in your original image. But I’m getting ahead of myself. Let’s first see how to import images into Lightroom.
Using the Library Module
The next stop after importing images into Lightroom is the Library module, where you’ll do your editing, rating, and sorting. It’s also where you can add appropriate keywords and other metadata, as well as perform some basic image processing on one or multiple images at the same time. You’ll be amazed at how easy it is to select, zoom in, and examine images for sharpness and content, as well as compare images in a side-by-side view. no longer will the thought of dealing with hundreds of images seem daunting. It might even seem like an adventure!
The Develop Module
The Develop module is where the heavy image processing occurs. Here you’ll find sophisticated, yet easy to use, tone and color developing controls, which in Lightroom2, can also be applied locally to specific parts of your image. You’ll also find cropping, straightening, and basic retouching tools for removing or altering unwanted image defects. With all these tools at your fingertips, you’ll be able to create a look that is uniquely yours and save it as a preset, ready to apply to other images. This chapter introduces this powerful module and goes into detail on using its view modes, retouching options, and cropping tools. In subsequent chapters, I’ll provide more details on mastering the Develop module’s tonal and color capabilities and creating useful presets based on the work of both Iceland and Tasmania Adventure team members.
Exporting Files
Within the Lightroom environment, you don’t actually save your image files as you might with other applications. As you work on an image, Lightroom automatically saves a set of instructions that are applied to your image whenever you open the application and select that image again. However, as soon as you decide to work outside the Lightroom environment or share your images, you will need to export them or make sure the Lightroom instructions accompany the image file. This chapter shows you how to do so, as well as how to export selected images asa Lightroom catalog, so they’re ready to be imported and incorporated into another Lightroom catalog. Finally, I’ll also cover compatibility between Lightroom and external editors such as Photoshop and Photoshop Elements.
Mikkel wants to let DAM Workflow readers know they can pre-order at a discounted price from Amazon:
http://www.amazon.com/Photoshop-Lightroom-Adventure-Mikkel-Aaland/dp/0596521014
Normally $39.99 you will only pay $26.39, plus US residents receive free shipping with Amazon’s Super Saver Shipping.
Lightroom 2 Workshops – Sydney
DAMsimple are presenting a series of workshops on Lightroom 2 for professionals. This will be hands-on based on our Adobe white paper, working with the Lightroom engineers, and years of training photographers, professional and amateur. The day is guaranteed to be fun and enlightening! Class sizes are strictly limited, with the first workshop starting in Sydney in November. Contact us to register your interest.
Comments are closed.